Travelers experience the distinct charm of different locations and hold the loveliness of these places close to their hearts. Photography is a useful instrument in saving special moments from your travels and sharing them with others. Mastering the travel photography tips and tricks in this article will turn your travel experience into captivating visual artistry, whether you are a beginner or an experienced photographer.
1. Experiment with Composition
The Rule of Thirds
Understanding how to take good travel photos starts with mastering basic compositional techniques. Use the rule of thirds to balance your frame. For example, if you photograph a sunset over the ocean, place the horizon line along the upper or lower third of the frame.
Leading Lines and Framing
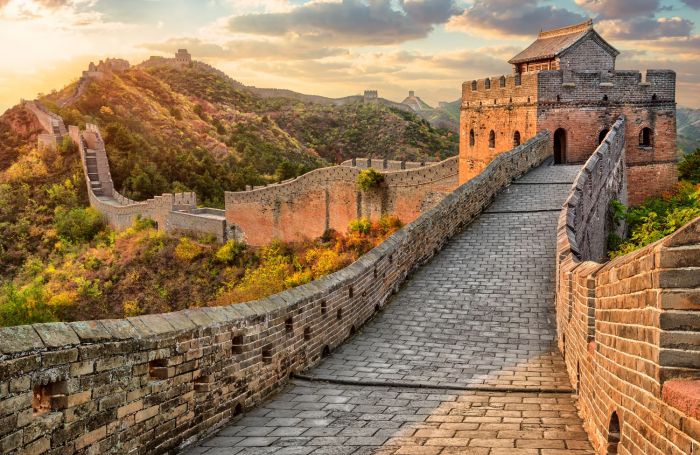
Leading lines are another main compositional principle. Roads, rivers, and pathways create natural leading lines, which are especially useful for travel snapshots. For instance, if you capture the Great Wall of China, use the winding path of the wall as a leading line. It will draw the viewer’s eye through the image, emphasizing the wall’s grandeur and length.
Natural frames highlight the main subject. This technique adds context and a sense of place to your visual narratives. When photographing a historic building, try shooting through an archway to frame the structure.
Incorporating Local Culture and People
Travel storytelling is unimaginable without familiarizing your audience with your new cultural experiences. Capture candid moments of locals, such as a street vendor preparing food or children playing. The everyday life scenes are relatable and engaging. For instance, while visiting a bustling market in Marrakech, photograph the vibrant stalls and the interactions between vendors and customers.
2. Control Lighting and Timing
Golden and Blue Hours
Travel tips for images also include recommendations on using the power of light to elevate your photographic artistry. To use the potential of the natural light to the fullest, plan your photoshoot to catch the golden and blue hours.
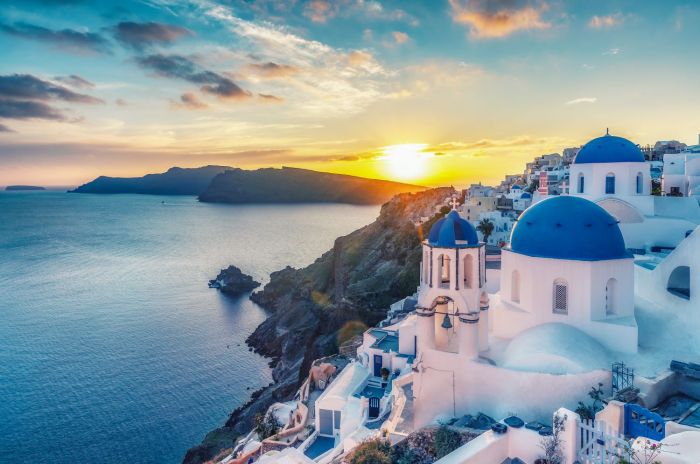
The time shortly after sunrise and before sunrise provides a soft, warm glow, making your photos especially appealing. Suppose you are photographing the Santorini skyline. In that case, the golden hour light will bathe the white buildings in a warm, golden hue, highlighting their textures and creating a magical atmosphere.
The twilights right before sunrise and after sunset color the sky deep blue. These colors make your pictures mysterious and dreamy. For instance, the blue hour can add a serene vibe to your images when photographing a cityscape like Paris. The city lights create a beautiful contrast against the deep blue sky.
Artificial Light
Artificial lighting can significantly enhance your indoor and night travel photos. Consider carrying portable LED lights when possible and turn on the flashlight on your smartphone camera. For example, when photographing a night market, use a small LED light to illuminate the food stalls. It will bring out the colors and details that might be lost in the dim ambient light.
Lighting Challenges
Travel often involves capturing moments in low light conditions, such as inside temples, museums, or during evening events. Ensuring stability with a tripod is crucial in this case. The additional equipment will let you achieve sharp, unblurry images. For instance, when photographing the interior of the Sagrada Familia in Barcelona, a tripod is essential. It can help you capture the play of light through the stained glass windows without sacrificing clarity.

3. Enhance Your Photos with Creative Editing
Organizing
Once the trip is over, you need to know what to do with travel photos. Sort your photos and choose those you would like to edit. Organize them into folders by location or date. Back them up to an external hard drive or a cloud service to prevent loss and damage.
Choosing a Software
If you edit travel photos often and want to improve your skills, consider investing in professional-grade programs like TopazLabs, Luminar Neo, or Adobe Lightroom. However, if you prefer casual edits on the go, photo filter apps like VSCO, Snapseed, and Adobe Lightroom Mobile can satisfy your needs. You can experiment with filters and adjustments without spending much time and effort.
Post-Processing
Correcting the exposure, contrast, highlights, and shadows can significantly improve your photo’s overall appearance. Once you have tackled the basics, you can move on to more advanced editing techniques. Use the HSL (Hue, Saturation, and Luminance) panel to fine-tune specific colors in your photo. Adjusting the clarity and dehaze sliders can add depth and detail to your images. Focus stacking, HDR blending, and panorama stitching can create high-quality images with greater detail.
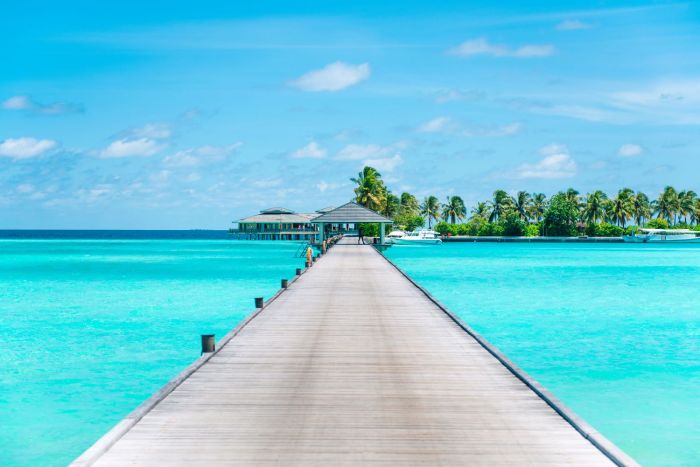
If you are new to photo editing, explore the built-in presets in your software to give your photos a consistent look and feel. Presets are pre-defined settings for adjusting elements like exposure, contrast, and color balance. For instance, if you want to enhance your beach shots, there are several presets for Lightroom to highlight the blue of the water and the warmth of the sand.
Conclusion
This article familiarizes you with composition principles, lighting and timing, and post-processing techniques. Create stunning images to reflect your experiences. Our tips will help you take your skills to the next level. Experiment with different techniques, be patient, and enjoy the process!